In this post, I’ll show you how to create an animated border for your images using simple CSS code in WordPress.

Animated Image Border
By the end of this tutorial, you’ll learn how to add this effect to your images.
Animated borders can add a touch of creativity to your website, making your images stand out. This technique is particularly useful for profile pictures, product images, and any other visuals you want to highlight.
Step-by-Step Guide to Adding Animated Image Borders in WordPress
Step 1: Add the CSS Code to Your Site
First, you need to add the following CSS code to your WordPress site. This code creates a keyframe animation that changes the border-radius of an image over time, giving it a dynamic, flowing effect.
@keyframes profileAnime {
    0% {
        border-radius: 60% 40% 30% 70% / 60% 30% 70% 40%;
    }
    50% {
        border-radius: 30% 60% 70% 40% / 50% 60% 30% 60%;
    }
    100% {
        border-radius: 60% 40% 30% 70% / 60% 30% 70% 40%;
    }
}

.animate-profileAnime img {
    animation: profileAnime 8s ease-in-out 1s infinite;
}
To add this code to your WordPress site, follow these steps:
Go to your WordPress dashboard.
Navigate to “Appearance” > “Customize.”
Click on “Additional CSS.”
Paste the CSS code into the text area.
Click “Publish” to save your changes.
Step 2: Add an Image and Adjust It
Now that the CSS code is in place, you need to add an image to your post or page.
Edit the post or page where you want to add the image and add an image block.
Click on “Add Media” and upload or select your image, Once the image is inserted, click on it to access the image settings.
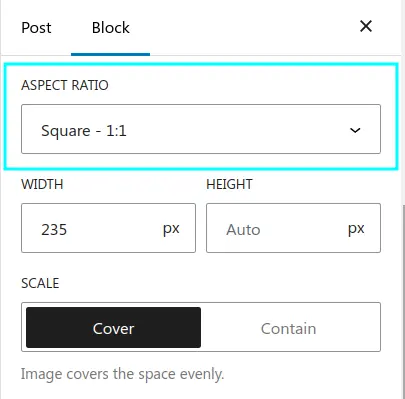
Set the aspect ratio to 1:1 to ensure the animation looks good.
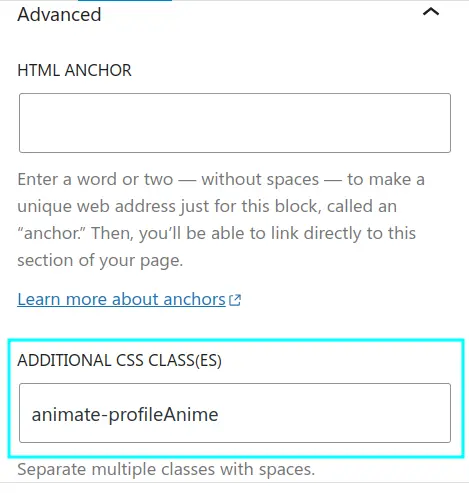
To activate the animation, you need to assign the animate-profileAnime class to your image.
In the block settings panel, find the “Advanced” section.
Add animate-profileAnime to the “Additional CSS Class” field.
Congratulations! You’ve successfully added an animated border to your image in WordPress. This simple yet effective technique can make your website more visually appealing and interactive.
Feel free to experiment with different border-radius values and animation durations to create a unique effect that fits your site’s design.
If this article is difficult for you to read in text, you can watch the video version below.
