Create a page with “Login” title and in the page settings, change its template to full screen and disable all page attributes such as title, sidebar, etc.
Now copy one of the following three templates in the functions.php of a child theme and replace your logo and background link with the links in the code and save the changes.
That’s it, now your new login page is accessible in “yoursite.com/login”.
You may also like the following article:
login shortcode with reCAPTCHA in WordPress without plugin
How to create Custom login page in WordPress
1. Create a page with “login” title
Our login form is going to be displayed on this page, it is important that its title is exactly “login”. Also, according to your theme, you have to change its template to full screen and disable all its accessories.
Here we make these settings for the three themes, the rest of the themes are the same as these three.
Twenty Twenty-Two theme login page setting

In Twenty Twenty-Two theme change page template to Blank and publish that.
Blocksy theme login page setting
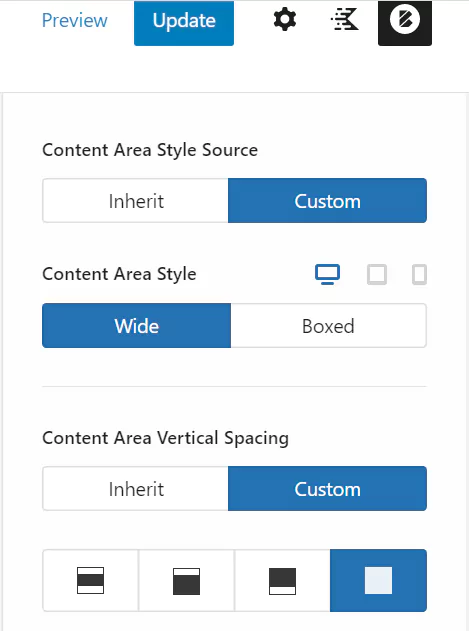
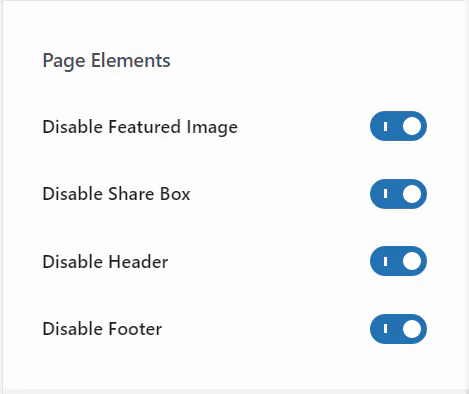
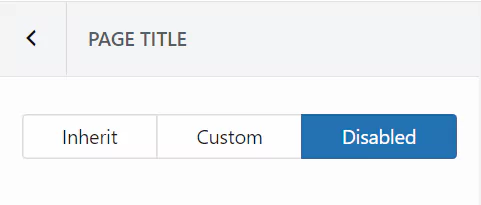
In Blocksy or Kadence theme change Content Area to Wide and disable top and bottom paddings, disable Page title and all page Elements.
Astra theme login page setting
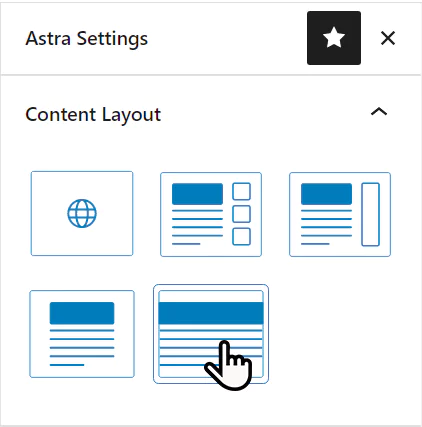

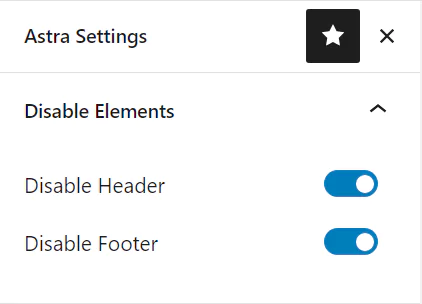
In Astra theme change Content Layout to Full Width and disable Sidebar and all page Elements.
2. Copy one of the following three templates in functions.php
In all these three template you only need to add your logo link and background link and you are all set.
$logo = ‘link to your logo‘;
$bg = ‘link to your background‘;
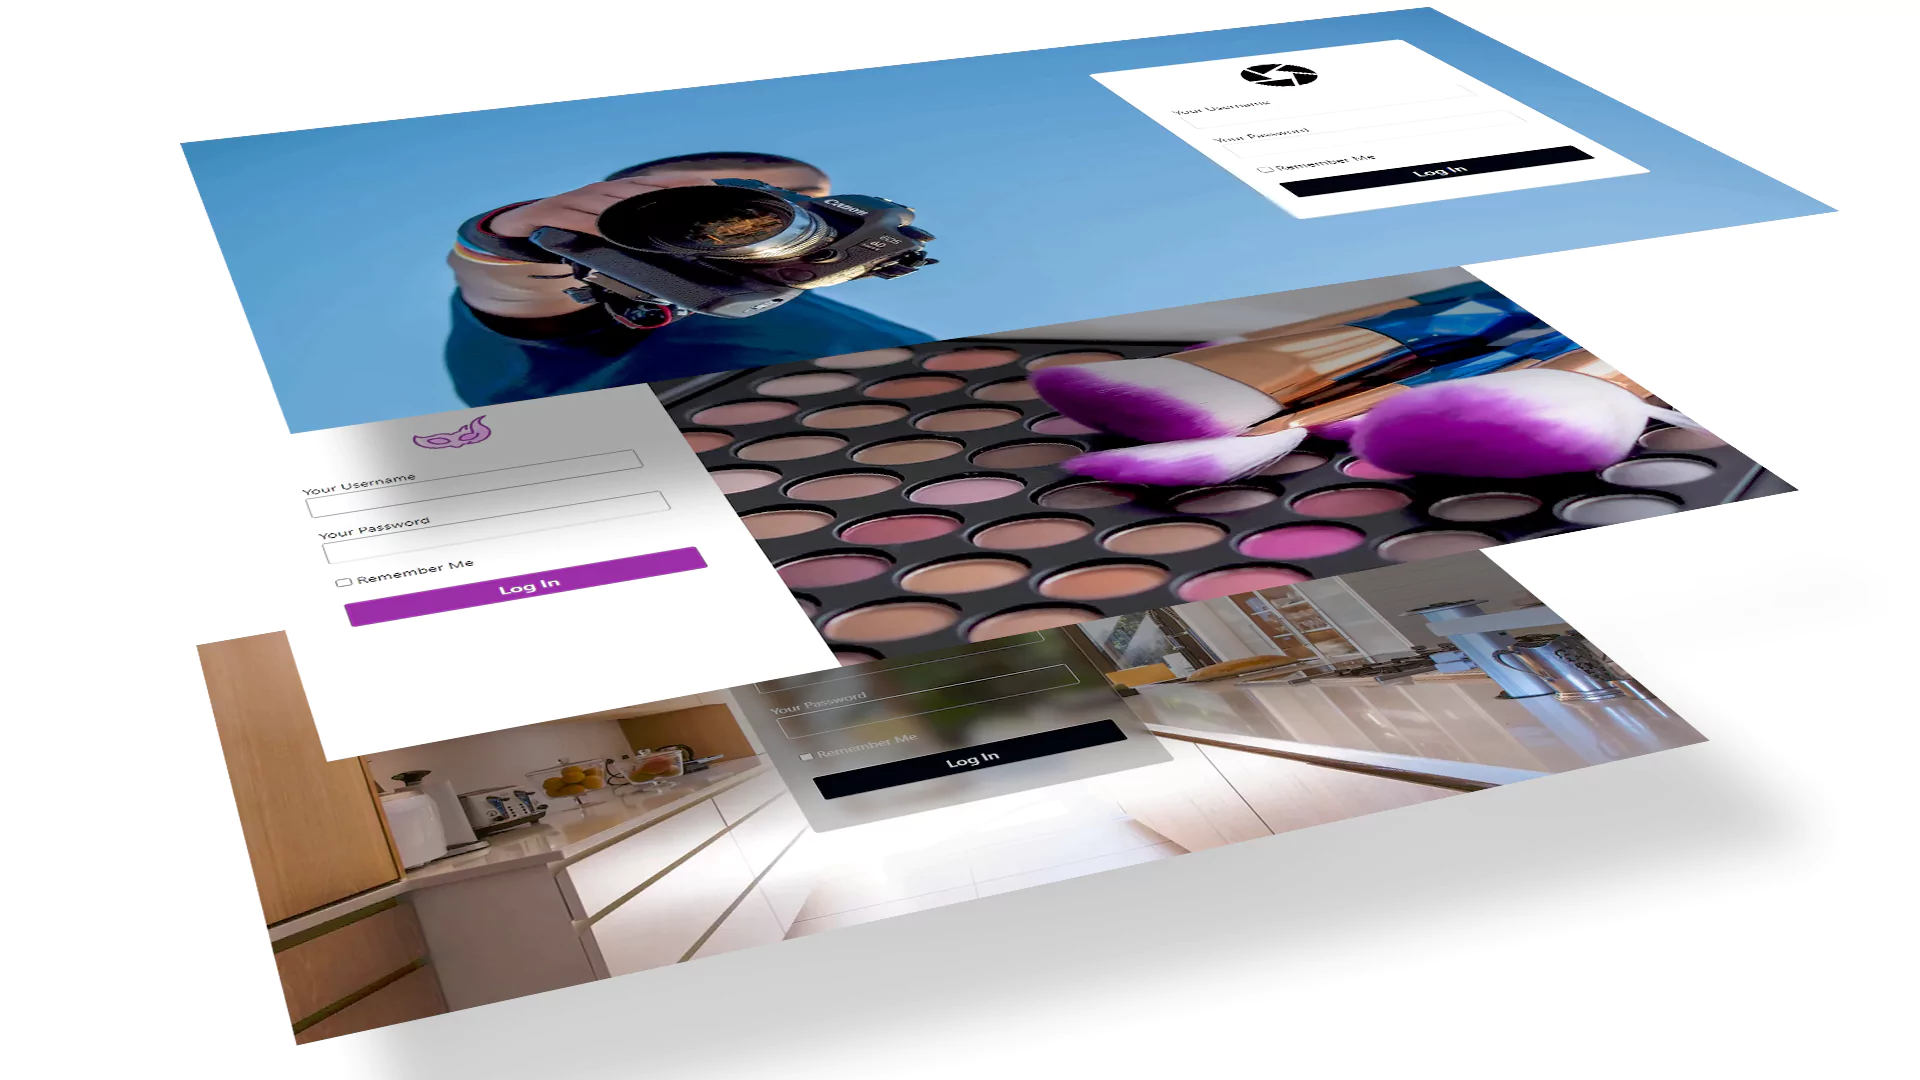
2.1. WordPress login page Glass Template

In the WordPress dashboard, go to Appearance ➡ Theme File Editor and copy the following code into the theme’s functions.php file and update it.
You must create a child theme before making any changes to functions.php file. Otherwise, the applied changes will be lost after each update.
Create child theme in WordPress step by step [without plugin]
As an alternative method, you can use the Code Snippets plugin to insert your codes into WordPress.
// redpishi.com login page glass template

add_filter( 'the_content', 'redpihi_custom_login' );
function redpihi_custom_login( $content ) {
$fullScreen = 1;
$logo = 'https://redpishi.com/wp-content/uploads/2022/06/1.png';
$bg ='https://redpishi.com/wp-content/uploads/2022/06/bg1-scaled.webp' ;
$loging_users = '<p>Hello '.wp_get_current_user()->user_login.'! You are logged in.</p>';
if (is_page(get_page_by_title( 'login' )->ID)) {
	if (is_user_logged_in()) {

		return	$content.$loging_users;	  } else {
if ($fullScreen == 1) echo '<style>header {display: none;} footer {display: none;} body {overflow: hidden;}</style>';	?>

		<div class ="redpishi-login-form" >
			<img id="rlogo" src="<?= $logo ?>" alt="" width="75" style="margin: 5px 0 25px 0;">

			<?php   wp_login_form(
							array(
								'echo' => true ,
								'redirect'       => ( is_ssl() ? 'https://' : 'http://' ) . $_SERVER['HTTP_HOST'] .'/' ,
								'label_username' => __( 'Your Username ' ),
								'label_password' => __( 'Your Password' ),
								'label_remember' => __( 'Remember Me' )
			              )
			);  } ?>

		</div>

<style>
body {
  margin: 0;
  background-image: url("<?= $bg ?>");
  background-color: white;
  background-position: center;
  background-repeat: no-repeat;
  background-size: cover;
  position: relative;
}

div.redpishi-login-form {
    border: 1px solid #ffffff3b;
    color: #020202;
    padding: 25px;
    border-radius: 5px;
    width: 300px!important;
    max-width: 90%!important;
    display: flex;
    flex-direction: column;
    align-items: center;
    margin: auto;
    margin-top: 100px;
    background-color: #95959545;
    backdrop-filter: blur(9px);
}
.redpishi-login-form input[type=text], .redpishi-login-form input[type=password] {
    border-radius: 5px;
    padding: 2px 10px;
    background-color: #ffffff00;
    font-size: 1.2rem;
    height: 38px;
    color: #ffffffde;
    border: 1px solid #ffffffbd;
    width: 100%;
}
.redpishi-login-form input:focus {
    color: white;
	border: 1px solid white;
}
.redpishi-login-form input#wp-submit {
    transition: 0.2s;
    cursor: pointer;
    padding: 7px 3px;
    background: #000000;
    border: none;
    width: 100%;
    font-size: 1.1rem;
    color: white;
    border-radius: 5px;
}
.log_erorr {
    color: white;
    background: red;
    padding: 0px 9px!important;
    border-radius: 3px;
    line-height: 2rem;
    width: 100%;
    margin-bottom: 15px;
}
.redpishi-login-form input#wp-submit:hover {
    transform: translateY(-3px);
}
.redpishi-login-form label {
    color: #ffffffde;
    font-size: 0.95rem;
    display: block;
}
</style>

<script>
const urlParams = new URLSearchParams(window.location.search);
const login = urlParams.get('login');
if ( login == "failed" ) {
let error = document.createElement("div");
error.className = "log_erorr";
let rlogo = document.querySelector('#rlogo')
rlogo.parentNode.insertBefore(error, rlogo.nextSibling);
error.innerHTML = "Wrong password. Try again..."
 }
</script>

<?php } else {
	return $content ;
}
}
add_action( 'wp_login_failed', 'my_front_end_login_fail' );
function my_front_end_login_fail( $username ) {
   $referrer = $_SERVER['HTTP_REFERER'];
   if ( !empty($referrer) && !strstr($referrer,'wp-login') && !strstr($referrer,'wp-admin') ) {
      wp_redirect( $referrer . '?login=failed' );
      exit;
   }
}
After adding the above code to functions.php, go to the login page you created in the first step and check it.
2.2. WordPress login page Make Up Template

Copy the following code in your child’s theme functions.php.
Remember to replace the logo and background links in the code with your own links.
// Redpishi.com WordPress login page Make Up Template

add_filter( 'the_content', 'redpihi_custom_login' );
function redpihi_custom_login( $content ) {
$fullScreen = 1;
$logo = 'https://redpishi.com/wp-content/uploads/2022/06/2.png';
$bg ='https://redpishi.com/wp-content/uploads/2022/06/bg2-scaled.webp';
$loging_users = '<p>Hello '.wp_get_current_user()->user_login.'! You are logged in.</p>';
if (is_page(get_page_by_title( 'login' )->ID)) {
	if (is_user_logged_in()) {
		return	$content.$loging_users;	  } else {
if ($fullScreen == 1) echo '<style>header {display: none;} footer {display: none;} body {overflow: hidden;}</style>';	?>
		<div class ="redpishi-login-form" >
			<img id="rlogo" src="<?= $logo ?>" alt="" width="75" style="margin: 5px 0 25px 0;" >
			<?php   wp_login_form(
							array(
								'echo' => true ,
								'redirect'       => ( is_ssl() ? 'https://' : 'http://' ) . $_SERVER['HTTP_HOST'] .'/' ,
								'label_username' => __( 'Your Username ' ),
								'label_password' => __( 'Your Password' ),
								'label_remember' => __( 'Remember Me' )
			              )
			);  } ?>

		</div>
<style>

@media screen and (min-width: 750px) {
  body {
    background-image: url("<?= $bg ?>");
    background-position: 400px 0px;
  }
div.redpishi-login-form {
    float: left;
    margin-left: 30px!important;
}}
body {
    margin: 0;
    background-color: white;
    background-repeat: no-repeat;
    background-size: cover;
    position: relative;
    }
div.redpishi-login-form {
    color: #020202;
    padding: 23px;
    border: 1px solid #ffffff4a;
    border-radius: 5px;
    width: 320px!important;
    max-width: 90%!important;
    display: flex;
    flex-direction: column;
    align-items: center;
    margin: auto;
    margin-top: 40px;
}
.redpishi-login-form input:focus {
    color: #00131c;
    border: 1px solid #00131c;
}
.redpishi-login-form input[type=text], .redpishi-login-form input[type=password] {
    font-size: 1.2rem;
    height: 38px;
    color: #00131c;
    border: 1px solid #a4a4a4;
    width: 100%;
}
.redpishi-login-form input#wp-submit {
    transition: 0.2s;
    cursor: pointer;
    padding: 7px 3px;
    background: #a22faf;
    border: none;
    width: 100%;
    font-size: 1.1rem;
    color: white;
}
.log_erorr {
    color: white;
    background: red;
    padding: 0px 9px!important;
    border-radius: 3px;
    line-height: 2rem;
    width: 100%;
    margin-bottom: 15px;
}
.redpishi-login-form input#wp-submit:hover {
    transform: translateY(-3px);
}

</style>

<script>
const urlParams = new URLSearchParams(window.location.search);
const login = urlParams.get('login');
if ( login == "failed" ) {
let error = document.createElement("div");
error.className = "log_erorr";
let rlogo = document.querySelector('#rlogo')
rlogo.parentNode.insertBefore(error, rlogo.nextSibling);
error.innerHTML = "Wrong password. Try again..."
 }
</script>

<?php } else {
	return $content ;
}
}

add_action( 'wp_login_failed', 'my_front_end_login_fail' );
function my_front_end_login_fail( $username ) {
   $referrer = $_SERVER['HTTP_REFERER'];
   if ( !empty($referrer) && !strstr($referrer,'wp-login') && !strstr($referrer,'wp-admin') ) {
      wp_redirect( $referrer . '?login=failed' );
      exit;
   }
}
After adding the above code to functions.php, go to the login page you created in the first step and check it.
2.3. WordPress login page Photography Template
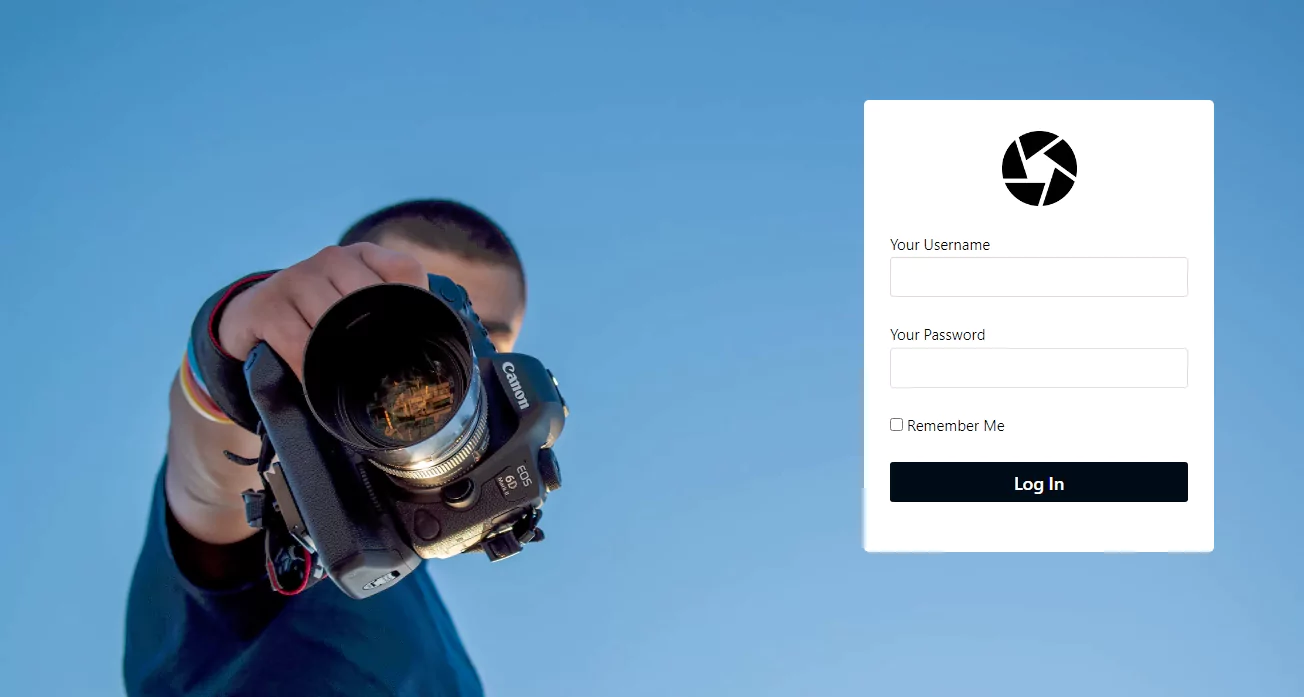
Like the last two copy the following code in your child’s theme functions.php.
Remember to replace the logo and background links in the code with your own links.
// Redpishi.com WordPress login page Photography Template

add_filter( 'the_content', 'redpihi_custom_login' );
function redpihi_custom_login( $content ) {
$fullScreen = 1;
$logo = 'https://redpishi.com/wp-content/uploads/2022/06/3.png';
$bg ='https://redpishi.com/wp-content/uploads/2022/06/bg3-scaled.webp';
$loging_users = '<p>Hello '.wp_get_current_user()->user_login.'! You are logged in.</p>';
if (is_page(get_page_by_title( 'login' )->ID)) {
	if (is_user_logged_in()) {
		return	$content.$loging_users;	  } else {
if ($fullScreen == 1) echo '<style>header {display: none;} footer {display: none;} body {overflow: hidden;}</style>';	?>

		<div class ="redpishi-login-form" >
			<img id="rlogo"  src="<?= $logo ?>" alt="" width="75" style="margin: 5px 0 25px 0;" >

			<?php   wp_login_form(
							array(
								'echo' => true ,
								'redirect'       => ( is_ssl() ? 'https://' : 'http://' ) . $_SERVER['HTTP_HOST'] .'/' ,
								'label_username' => __( 'Your Username ' ),
								'label_password' => __( 'Your Password' ),
								'label_remember' => __( 'Remember Me' )
			              )
			);  } ?>

		</div>

<style>

@media screen and (min-width: 750px) {
  body {
    background-image: url("<?= $bg ?>");
    background-position: 0px 0px;
  }
 div.redpishi-login-form {
     float: right;
    margin-right: 90px!important;
 }}
body {
    margin: 0;
    background-color: white;
    background-repeat: no-repeat;
    background-size: cover;
    position: relative;
    }
div.redpishi-login-form {
    background-color: white;
    color: #020202;
    padding: 23px;
    border: 1px solid #ffffff4a;
    border-radius: 5px;
    width: 300px!important;
    max-width: 90%!important;
    display: flex;
    flex-direction: column;
    align-items: center;
    margin: auto;
    margin-top: 90px;
}

.redpishi-login-form input:focus {
    color: #00131c;
    border: 1px solid #00131c;
}
.redpishi-login-form input[type=text], .redpishi-login-form input[type=password] {
    font-size: 1.2rem;
    height: 38px;
    color: #00131c;
    border: 1px solid #a4a4a4;
    width: 100%;
}
.redpishi-login-form input#wp-submit {
    transition: 0.2s;
    cursor: pointer;
    padding: 7px 3px;
    background: #000000;
    border: none;
    width: 100%;
    font-size: 1.1rem;
    color: white;
    border-radius: 5px;
}
.log_erorr {
    color: white;
    background: red;
    padding: 0px 9px!important;
    border-radius: 3px;
    line-height: 2rem;
    width: 100%;
    margin-bottom: 15px;
}
.redpishi-login-form input#wp-submit:hover {
    transform: translateY(-3px);
}
.redpishi-login-form label {
    color: #626262;
    font-size: 0.95rem;
    display: block;
}
</style>

<script>
const urlParams = new URLSearchParams(window.location.search);
const login = urlParams.get('login');
if ( login == "failed" ) {
let error = document.createElement("div");
error.className = "log_erorr";
let rlogo = document.querySelector('#rlogo')
rlogo.parentNode.insertBefore(error, rlogo.nextSibling);
error.innerHTML = "Wrong password. Try again..."
 }
</script>

<?php } else {
	return $content ;
}
}


add_action( 'wp_login_failed', 'my_front_end_login_fail' );
function my_front_end_login_fail( $username ) {
   $referrer = $_SERVER['HTTP_REFERER'];
   if ( !empty($referrer) && !strstr($referrer,'wp-login') && !strstr($referrer,'wp-admin') ) {
      wp_redirect( $referrer . '?login=failed' );
      exit;
   }
}
That’s it, After adding the above code to functions.php, go to the login page you created in the first step and check it.
Code explanation
In this code, using the wp_login_form() function, we have entered the login form in the login page. This function gets an Array, you can customize username, password and password labels by entering your on text.
If the user has already logged in, he will see the following message on the login page:
Hello ‘USERNAME’! You are logged in. You can customize this message in the following part of the code:
$loging_users = ‘Hello ‘.wp_get_current_user()->user_login.’! You are logged in.‘;
If you want to edit the color of the buttons, the size of the text or the padding, you can easily apply your own customization to the CSS section of template.
If this article is difficult for you to read in text, you can watch the video version below.
Finally, we will be happy if you write your comments and questions in the comments section.

thanks for this awesome article please tell how add google recaptcha, register button , lost password button to this form
Check out the following article:
https://redpishi.com/wordpress-tutorials/login-shortcode-with-recaptcha/